| assets/css | ||
| build/vite-plugins | ||
| components | ||
| composables | ||
| docs/images | ||
| manifest | ||
| modules | ||
| public | ||
| scripts | ||
| server | ||
| types | ||
| utils | ||
| .gitignore | ||
| app.vue | ||
| eslint.config.mjs | ||
| nuxt.config.ts | ||
| package.json | ||
| pm2.config.js | ||
| pnpm-lock.yaml | ||
| README.md | ||
| tailwind.config.js | ||
| tsconfig.json | ||
EasyAI 插件开发脚手架
项目介绍
本项目支持以插件的方式为EasyAI平台提供组件服务,以实现对EasyAI平台前端组件库进行扩展,实现自定义组件以满足业务需求。
功能描述和核心功能
- 支持扩展AI应用封装组件库。例如提示词、图像上传等各种组件,还可以访问自己的私有化数据库等
- 支持扩展首页组件库。例如设计新的应用展示模块等其他各种功能。
- 支持应用引导组件库
- typescript类型支持
组件开发
项目启动
- 安装依赖
pnpm install
- 启动项目
pnpm dev
- 访问地址:http://localhost:3201
- 组件目录:components
- 维护组件信息目录:manifest
- 组件调试入口: app.vue
- EasyAI平台,全局注入的数据和方法: types/common.ts
- 注入的素材库数据:GlobalInjectMaterials
- mock数据:composables/mock/material.data.ts
- 在组件中使用:components/RecommendedImages.vue
const { materials: materialList } =
    inject<GlobalInjectMaterials>(GlobalInjectKeyConst.AllMaterials, {
    materials: ref<IImageSource>([]),
    }) || {};
- 注入的上传文件方法:GlobalInjectUploadFileToOSS
- 在组件中使用:components/drawPanne/ImageUpload.vue
const { useUtilsUploadFileToOSS } = inject<GlobalInjectUploadFileToOSS>(
    GlobalInjectKeyConst.UploadFileToOSS,
    {
     useUtilsUploadFileToOSS: async (file: File | Blob, filename?: string) => "",
    },
 );
- 在组件中使用:components/drawPanne/ImageUpload.vue
- 其他注入数据:用户信息、会员信息、具有权限的APP应用信息,公开的作品列表等
- 注入的素材库数据:GlobalInjectMaterials
示例组件 (图片上传组件)
- 组件位置:components/drawPanne/ImageUpload.vue
正常的nuxt(vue3)项目组件开发,直接在components文件夹下创建即可 - 维护组件信息文件:manifest/ImageUpload.ts
需要参照IComponentMateInfo类型约束文件进行定义
export default {
    name: "DrawImageUpload", // 组件名称
    path: "./components/drawPanne/ImageUpload.vue", // 组件路径
    scenes: ComponentSceneConst.DrawPanne, // 组件场景
    description: "A image upload component", // 组件描述
    data: { // 组件数据
        paramName: "upload_image_path", // 参数名称
        label: "图片上传", // 组件标签
        icon: "icon-park:upload-picture", // 组件图标
        group: ComponentGroupConst.IMAGE, // 组件分组
        isRefComponent: true, // 是否为引用组件 (引用组件,在执行绘画的时候会执行参数赋值操作)
    },
} satisfies IComponentMateInfo;
- 组件调试入口:app.vue
<template>
  <div class="remote-ui">
    <!--    调试对象-->
    <DrawPanneImageUpload />
  </div>
</template>
<script lang="ts" setup>
import {
  GlobalInjectKeyConst,
  type GlobalInjectMaterials,
} from "~/types/common";
import { MockMaterials } from "~/composables/mock/material.data";

const materialData = ref(MockMaterials);
/**
 * EasyAI平台,已全局注入素材库库信息这里,开发环境使用mock数据用于调试
 */
provide<GlobalInjectMaterials>(GlobalInjectKeyConst.AllMaterials, {
  materials: materialData,
  refreshMaterials: async () => [],
});
</script>
测试环境部署
- 打包
pnpm build
- 启动项目
pnpm serve
- 访问
http://localhost:3200
生产环境部署
- 打包
pnpm build
- 复制构建产物目录
.output,pm2.config.js到服务器 - 在服务器上安装node、pm2(具体安装方式请自行搜索)
- 使用nginx代理项目/plugins/ 路由到项目端口
3020
使用
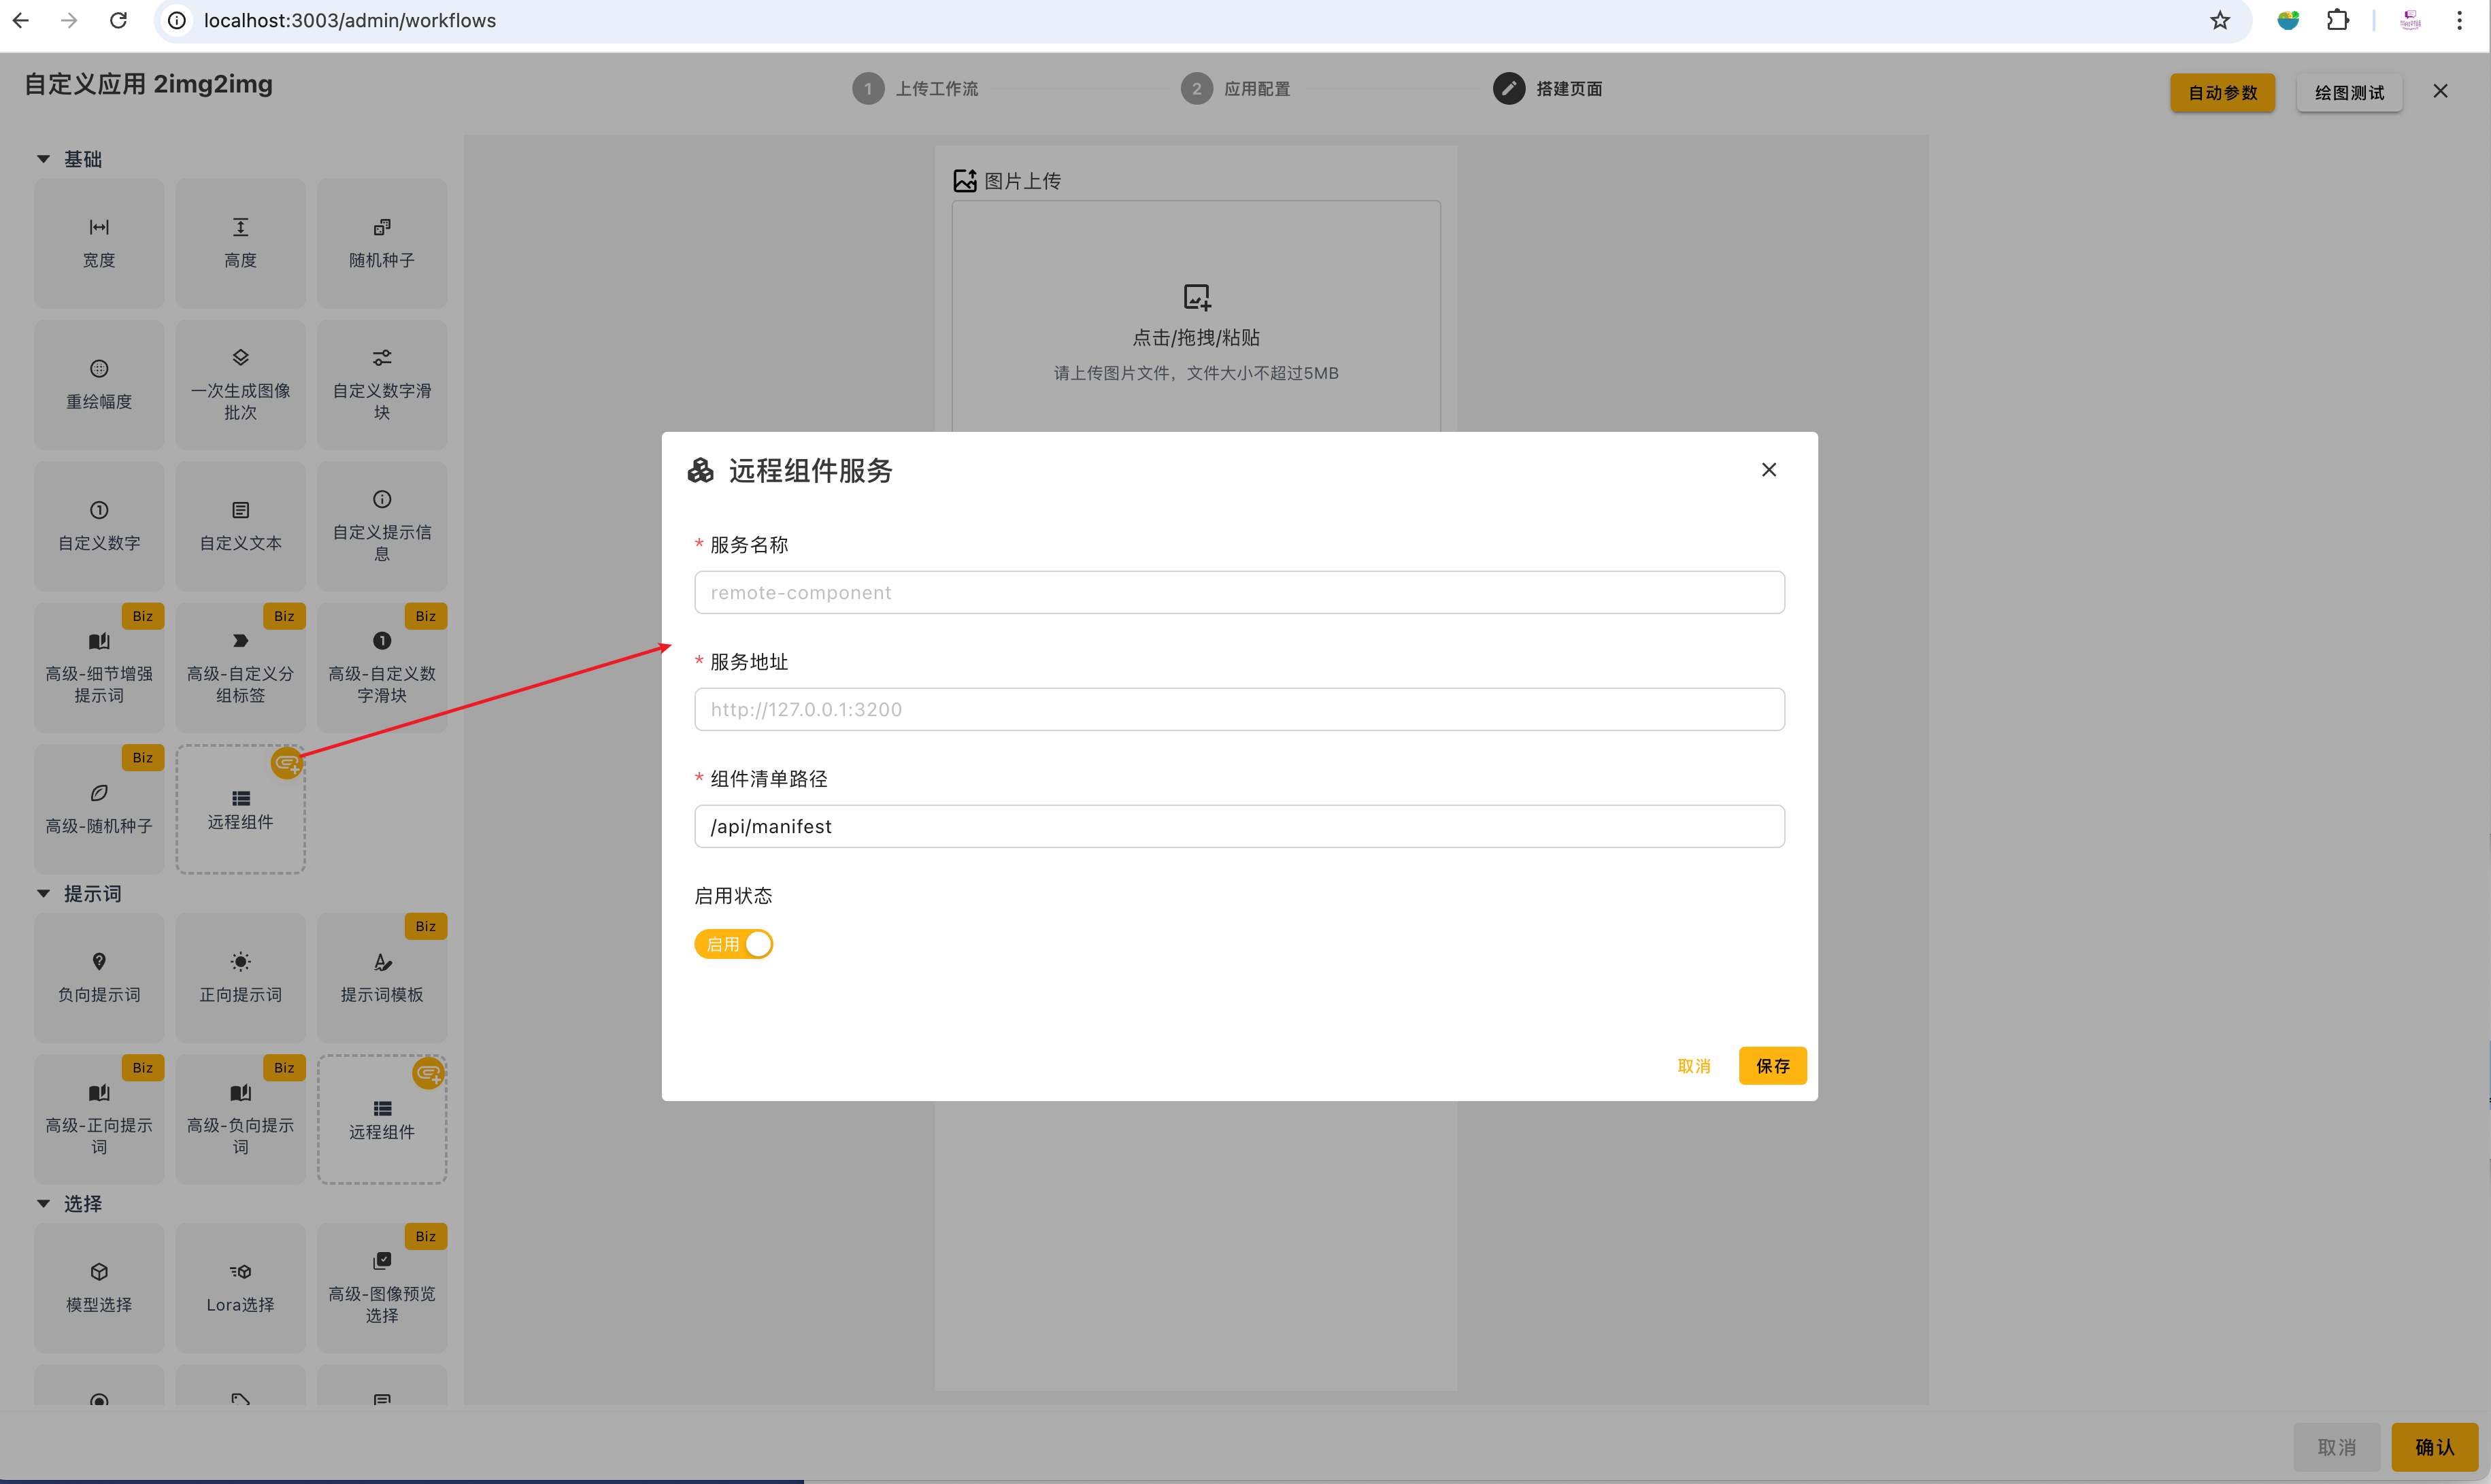
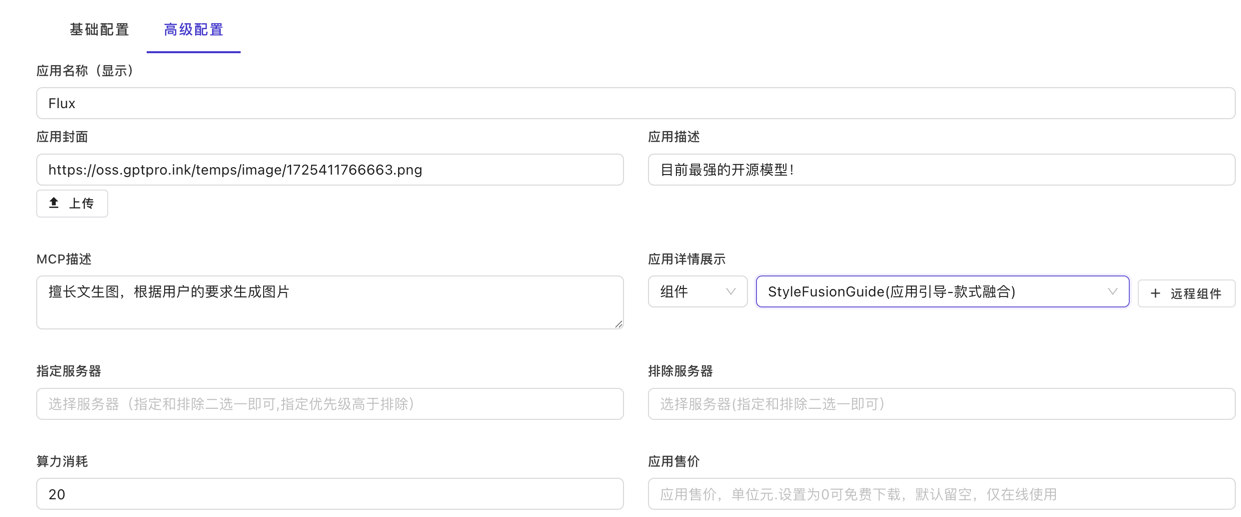
- 在EasyAI平台上使用插件(可以在应用设置-高级配置-应用详情页展示,搭建页面和自定义页面样式三个场景下使用插件)