| .ci | ||
| .github/workflows | ||
| comfy | ||
| comfy_extras | ||
| custom_nodes | ||
| input | ||
| models | ||
| notebooks | ||
| output | ||
| script_examples | ||
| tests | ||
| tests-ui | ||
| __init__.py | ||
| .gitignore | ||
| CODEOWNERS | ||
| comfyui_screenshot.png | ||
| extra_model_paths.yaml.example | ||
| LICENSE | ||
| main.py | ||
| MANIFEST.in | ||
| mypy.ini | ||
| pyproject.toml | ||
| pytest.ini | ||
| README.md | ||
| requirements-dev.txt | ||
| requirements.txt | ||
| setup.py | ||
ComfyUI
The most powerful and modular stable diffusion GUI and backend.
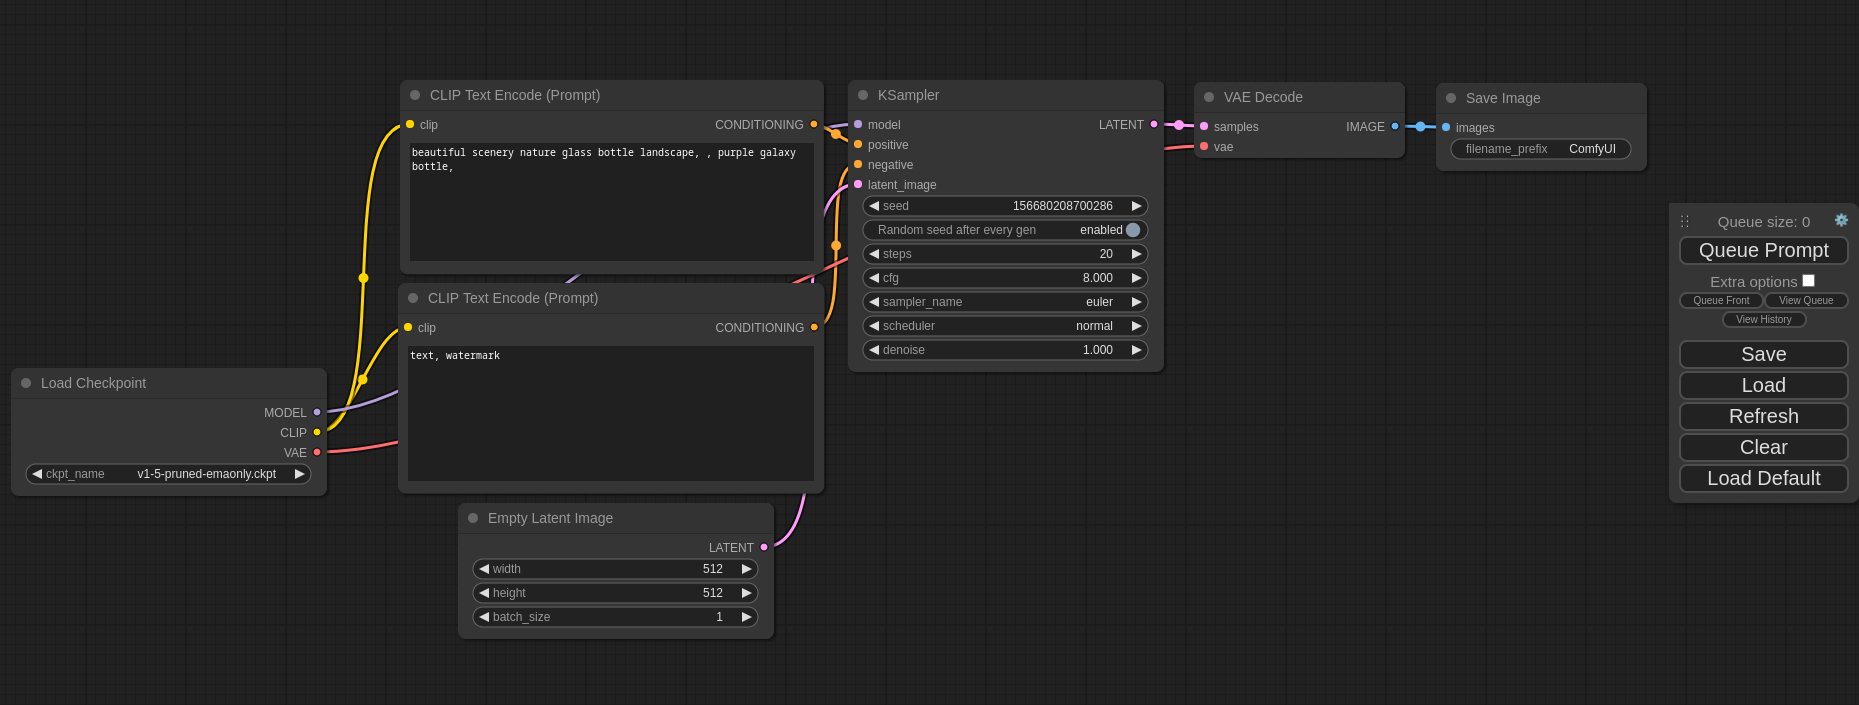
This UI will let you design and execute advanced stable diffusion pipelines using a graph/nodes/flowchart based interface. For some workflow examples and see what ComfyUI can do you can check out:
ComfyUI Examples
Installing ComfyUI
Features
- Nodes/graph/flowchart interface to experiment and create complex Stable Diffusion workflows without needing to code anything.
- Fully supports SD1.x, SD2.x, SDXL, Stable Video Diffusion and Stable Cascade
- Asynchronous Queue system
- Many optimizations: Only re-executes the parts of the workflow that changes between executions.
- Command line option:
--lowvramto make it work on GPUs with less than 3GB vram (enabled automatically on GPUs with low vram) - Works even if you don't have a GPU with:
--cpu(slow) - Can load ckpt, safetensors and diffusers models/checkpoints. Standalone VAEs and CLIP models.
- Embeddings/Textual inversion
- Loras (regular, locon and loha)
- Hypernetworks
- Loading full workflows (with seeds) from generated PNG files.
- Saving/Loading workflows as Json files.
- Nodes interface can be used to create complex workflows like one for Hires fix or much more advanced ones.
- Area Composition
- Inpainting with both regular and inpainting models.
- ControlNet and T2I-Adapter
- Upscale Models (ESRGAN, ESRGAN variants, SwinIR, Swin2SR, etc...)
- unCLIP Models
- GLIGEN
- Model Merging
- LCM models and Loras
- SDXL Turbo
- Latent previews with TAESD
- Starts up very fast.
- Works fully offline: will never download anything.
- Config file to set the search paths for models.
Workflow examples can be found on the Examples page
Getting Started
Installing
You must have Python 3.10, 3.11 or 3.12 installed. On Windows, download the latest Python from their website. You can also directly download 3.11.4 here.
On macOS, install exactly Python 3.11 using brew, which you can download from https://brew.sh, using this command: brew install python@3.11. Do not use 3.9 or older, and do not use 3.12 or newer. Its compatibility with Stable Diffusion in both directions is broken.
- Create a virtual environment:
python -m virtualenv venv - Activate it on Windows (PowerShell):
Set-ExecutionPolicy Unrestricted -Scope Process
& .\venv\Scripts\activate.ps1
Linux and macOS
source ./venv/bin/activate
- Then, run the following command to install
comfyuiinto your current environment. This will correctly select the version of pytorch that matches the GPU on your machine (NVIDIA or CPU on Windows, NVIDIA AMD or CPU on Linux):
Advanced: If you are running in Google Collab or another environment which has already installedpip install git+https://github.com/hiddenswitch/ComfyUI.gittorchfor you, disable build isolation, and the package will recognize your currently installed torch.# You will need wheel, which isn't included in Python 3.11 or later pip install wheel pip install --no-build-isolation git+https://github.com/hiddenswitch/ComfyUI.git - To run the web server:
Create the directories you can fill with checkpoints:comfyui
Your current working directory is wherever you started runningcomfyui --create-directoriescomfyui. You don't need to clone this repository, observe it is omitted from the instructions. You cancdinto a different directory containingmodels/, or if the models are located somehwere else, likeC:/some directory/models, do:
You can see all the command line options with hints usingcomfyui --cwd="C:/some directory/"comfyui --help.
Manual Install (Windows, Linux, macOS) For Development
-
Clone this repo:
git clone https://github.com/comfyanonymous/ComfyUI.git cd ComfyUI -
Put your Stable Diffusion checkpoints (the huge ckpt/safetensors files) into the
models/checkpointsfolder. You can download SD v1.5 using the following command:curl -L https://huggingface.co/runwayml/stable-diffusion-v1-5/resolve/main/v1-5-pruned-emaonly.ckpt -o ./models/checkpoints/v1-5-pruned-emaonly.ckpt -
Create a virtual environment:
-
Create an environment:
python -m virtualenv venv -
Activate it:
Windows (PowerShell):
Set-ExecutionPolicy Unrestricted -Scope Process
& .\venv\Scripts\activate.ps1
Linux and macOS
source ./venv/bin/activate
-
-
Then, run the following command to install
comfyuiinto your current environment. This will correctly select the version of pytorch that matches the GPU on your machine (NVIDIA or CPU on Windows, NVIDIA AMD or CPU on Linux):pip install -e .[dev] -
To run the web server:
comfyuiTo generate python OpenAPI models:
comfyui-openapi-genTo run tests:
pytest tests/inference
(cd tests-ui && npm ci && npm run test:generate && npm test)
You can use
comfyuias an API. Visit the OpenAPI specification. This file can be used to generate typed clients for your preferred language. -
To create the standalone binary:
python -m PyInstaller --onefile --noupx -n ComfyUI --add-data="comfy/;comfy/" --paths $(pwd) --paths comfy/cmd main.py
Because the package is installed "editably" with pip install -e ., any changes you make to the repository will affect the next launch of comfy. In IDEA based editors like PyCharm and IntelliJ, the Relodium plugin supports modifying your custom nodes or similar code while the server is running.
Intel, DirectML and AMD Experimental Support
DirectML (AMD Cards on Windows)
Follow the manual installation steps. Then:
pip uninstall torch torchvision torchaudio
pip install torch torchvision torchaudio
pip install torch-directml
Then, launch ComfyUI with comfyui --directml.
For AMD cards not officially supported by ROCm
Try running it with this command if you have issues:
For 6700, 6600 and maybe other RDNA2 or older: HSA_OVERRIDE_GFX_VERSION=10.3.0 comfyui
For AMD 7600 and maybe other RDNA3 cards: HSA_OVERRIDE_GFX_VERSION=11.0.0 comfyui
`
Custom Nodes
Custom Nodes can be added to ComfyUI by copying and pasting Python files into your ./custom_nodes directory.
Authoring Custom Nodes
Create a requirements.txt:
comfyui
Observe comfyui is now a requirement for using your custom nodes. This will ensure you will be able to access comfyui as a library. For example, your code will now be able to import the folder paths using from comfyui.cmd import folder_paths. Because you will be using my fork, use this:
comfyui @ git+https://github.com/hiddenswitch/ComfyUI.git
Additionally, create a pyproject.toml:
[build-system]
requires = ["setuptools", "wheel", "pip"]
build-backend = "setuptools.build_meta"
This ensures you will be compatible with later versions of Python.
Finally, move your nodes to a directory with an empty __init__.py, i.e., a package. You should have a file structure like this:
# the root of your git repository
/.git
/pyproject.toml
/requirements.txt
/mypackage_custom_nodes/__init__.py
/mypackage_custom_nodes/some_nodes.py
Finally, create a setup.py at the root of your custom nodes package / repository. Here is an example:
setup.py
from setuptools import setup, find_packages
import os.path

setup(
    name="mypackage",
    version="0.0.1",
    packages=find_packages(),
    install_requires=open(os.path.join(os.path.dirname(__file__), "requirements.txt")).readlines(),
    author='',
    author_email='',
    description='',
    entry_points={
        'comfyui.custom_nodes': [
            'mypackage = mypackage_custom_nodes',
        ],
    },
)
All .py files located in the package specified by the entrypoint with your package's name will be scanned for node class mappings declared like this:
NODE_CLASS_MAPPINGS = {
    "BinaryPreprocessor": Binary_Preprocessor
}
NODE_DISPLAY_NAME_MAPPINGS = {
    "BinaryPreprocessor": "Binary Lines"
}
These packages will be scanned recursively.
Troubleshooting
I see a message like
RuntimeError: '"upsample_bilinear2d_channels_last" not implemented for 'Half''
You must use Python 3.11 on macOS devices, and update to at least Ventura.
I see a message like
Error while deserializing header: HeaderTooLarge
Download your model file again.
Using the Editor
Notes
Only parts of the graph that have an output with all the correct inputs will be executed.
Only parts of the graph that change from each execution to the next will be executed, if you submit the same graph twice only the first will be executed. If you change the last part of the graph only the part you changed and the part that depends on it will be executed.
Dragging a generated png on the webpage or loading one will give you the full workflow including seeds that were used to create it.
You can use () to change emphasis of a word or phrase like: (good code:1.2) or (bad code:0.8). The default emphasis for () is 1.1. To use () characters in your actual prompt escape them like \( or \).
You can use {day|night}, for wildcard/dynamic prompts. With this syntax "{wild|card|test}" will be randomly replaced by either "wild", "card" or "test" by the frontend every time you queue the prompt. To use {} characters in your actual prompt escape them like: \{ or \}.
Dynamic prompts also support C-style comments, like // comment or /* comment */.
To use a textual inversion concepts/embeddings in a text prompt put them in the models/embeddings directory and use them in the CLIPTextEncode node like this (you can omit the .pt extension):
embedding:embedding_filename.pt
How to increase generation speed?
Make sure you use the regular loaders/Load Checkpoint node to load checkpoints. It will auto pick the right settings depending on your GPU.
You can set this command line setting to disable the upcasting to fp32 in some cross attention operations which will increase your speed. Note that this will very likely give you black images on SD2.x models. If you use xformers or pytorch attention this option does not do anything.
--dont-upcast-attention
How to show high-quality previews?
Use --preview-method auto to enable previews.
The default installation includes a fast latent preview method that's low-resolution. To enable higher-quality previews with TAESD, download the taesd_decoder.pth (for SD1.x and SD2.x) and taesdxl_decoder.pth (for SDXL) models and place them in the models/vae_approx folder. Once they're installed, restart ComfyUI to enable high-quality previews.
Keyboard Shortcuts
| Keybind | Explanation |
|---|---|
| Ctrl + Enter | Queue up current graph for generation |
| Ctrl + Shift + Enter | Queue up current graph as first for generation |
| Ctrl + Z/Ctrl + Y | Undo/Redo |
| Ctrl + S | Save workflow |
| Ctrl + O | Load workflow |
| Ctrl + A | Select all nodes |
| Alt + C | Collapse/uncollapse selected nodes |
| Ctrl + M | Mute/unmute selected nodes |
| Ctrl + B | Bypass selected nodes (acts like the node was removed from the graph and the wires reconnected through) |
| Delete/Backspace | Delete selected nodes |
| Ctrl + Delete/Backspace | Delete the current graph |
| Space | Move the canvas around when held and moving the cursor |
| Ctrl/Shift + Click | Add clicked node to selection |
| Ctrl + C/Ctrl + V | Copy and paste selected nodes (without maintaining connections to outputs of unselected nodes) |
| Ctrl + C/Ctrl + Shift + V | Copy and paste selected nodes (maintaining connections from outputs of unselected nodes to inputs of pasted nodes) |
| Shift + Drag | Move multiple selected nodes at the same time |
| Ctrl + D | Load default graph |
| Q | Toggle visibility of the queue |
| H | Toggle visibility of history |
| R | Refresh graph |
| Double-Click LMB | Open node quick search palette |
Ctrl can also be replaced with Cmd instead for macOS users
Command Line Arguments
usage: comfyui.exe [-h] [-c CONFIG_FILE]
                   [--write-out-config-file CONFIG_OUTPUT_PATH] [-w CWD]
                   [-H [IP]] [--port PORT] [--enable-cors-header [ORIGIN]]
                   [--max-upload-size MAX_UPLOAD_SIZE]
                   [--extra-model-paths-config PATH [PATH ...]]
                   [--output-directory OUTPUT_DIRECTORY]
                   [--temp-directory TEMP_DIRECTORY]
                   [--input-directory INPUT_DIRECTORY] [--auto-launch]
                   [--disable-auto-launch] [--cuda-device DEVICE_ID]
                   [--cuda-malloc | --disable-cuda-malloc]
                   [--dont-upcast-attention] [--force-fp32 | --force-fp16]
                   [--bf16-unet | --fp16-unet | --fp8_e4m3fn-unet | --fp8_e5m2-unet]
                   [--fp16-vae | --fp32-vae | --bf16-vae] [--cpu-vae]
                   [--fp8_e4m3fn-text-enc | --fp8_e5m2-text-enc | --fp16-text-enc | --fp32-text-enc]
                   [--directml [DIRECTML_DEVICE]] [--disable-ipex-optimize]
                   [--preview-method [none,auto,latent2rgb,taesd]]
                   [--use-split-cross-attention | --use-quad-cross-attention | --use-pytorch-cross-attention]
                   [--disable-xformers]
                   [--gpu-only | --highvram | --normalvram | --lowvram | --novram | --cpu]
                   [--disable-smart-memory] [--deterministic]
                   [--dont-print-server] [--quick-test-for-ci]
                   [--windows-standalone-build] [--disable-metadata]
                   [--multi-user] [--create-directories]
                   [--plausible-analytics-base-url PLAUSIBLE_ANALYTICS_BASE_URL]
                   [--plausible-analytics-domain PLAUSIBLE_ANALYTICS_DOMAIN]
                   [--analytics-use-identity-provider]
                   [--distributed-queue-connection-uri DISTRIBUTED_QUEUE_CONNECTION_URI]
                   [--distributed-queue-worker] [--distributed-queue-frontend]
                   [--distributed-queue-name DISTRIBUTED_QUEUE_NAME]
options:
-h, --help            show this help message and exit
-c CONFIG_FILE, --config CONFIG_FILE
config file path
--write-out-config-file CONFIG_OUTPUT_PATH
takes the current command line args and writes them
out to a config file at the given path, then exits
-w CWD, --cwd CWD     Specify the working directory. If not set, this is the
current working directory. models/, input/, output/
and other directories will be located here by default.
[env var: COMFYUI_CWD]
-H [IP], --listen [IP]
Specify the IP address to listen on (default:
127.0.0.1). If --listen is provided without an
argument, it defaults to 0.0.0.0. (listens on all)
[env var: COMFYUI_LISTEN]
--port PORT           Set the listen port. [env var: COMFYUI_PORT]
--enable-cors-header [ORIGIN]
Enable CORS (Cross-Origin Resource Sharing) with
optional origin or allow all with default '*'. [env
var: COMFYUI_ENABLE_CORS_HEADER]
--max-upload-size MAX_UPLOAD_SIZE
Set the maximum upload size in MB. [env var:
COMFYUI_MAX_UPLOAD_SIZE]
--extra-model-paths-config PATH [PATH ...]
Load one or more extra_model_paths.yaml files. [env
var: COMFYUI_EXTRA_MODEL_PATHS_CONFIG]
--output-directory OUTPUT_DIRECTORY
Set the ComfyUI output directory. [env var:
COMFYUI_OUTPUT_DIRECTORY]
--temp-directory TEMP_DIRECTORY
Set the ComfyUI temp directory (default is in the
ComfyUI directory). [env var: COMFYUI_TEMP_DIRECTORY]
--input-directory INPUT_DIRECTORY
Set the ComfyUI input directory. [env var:
COMFYUI_INPUT_DIRECTORY]
--auto-launch         Automatically launch ComfyUI in the default browser.
[env var: COMFYUI_AUTO_LAUNCH]
--disable-auto-launch
Disable auto launching the browser. [env var:
COMFYUI_DISABLE_AUTO_LAUNCH]
--cuda-device DEVICE_ID
Set the id of the cuda device this instance will use.
[env var: COMFYUI_CUDA_DEVICE]
--cuda-malloc         Enable cudaMallocAsync (enabled by default for torch
2.0 and up). [env var: COMFYUI_CUDA_MALLOC]
--disable-cuda-malloc
Disable cudaMallocAsync. [env var:
COMFYUI_DISABLE_CUDA_MALLOC]
--dont-upcast-attention
Disable upcasting of attention. Can boost speed but
increase the chances of black images. [env var:
COMFYUI_DONT_UPCAST_ATTENTION]
--force-fp32          Force fp32 (If this makes your GPU work better please
report it). [env var: COMFYUI_FORCE_FP32]
--force-fp16          Force fp16. [env var: COMFYUI_FORCE_FP16]
--bf16-unet           Run the UNET in bf16. This should only be used for
testing stuff. [env var: COMFYUI_BF16_UNET]
--fp16-unet           Store unet weights in fp16. [env var:
COMFYUI_FP16_UNET]
--fp8_e4m3fn-unet     Store unet weights in fp8_e4m3fn. [env var:
COMFYUI_FP8_E4M3FN_UNET]
--fp8_e5m2-unet       Store unet weights in fp8_e5m2. [env var:
COMFYUI_FP8_E5M2_UNET]
--fp16-vae            Run the VAE in fp16, might cause black images. [env
var: COMFYUI_FP16_VAE]
--fp32-vae            Run the VAE in full precision fp32. [env var:
COMFYUI_FP32_VAE]
--bf16-vae            Run the VAE in bf16. [env var: COMFYUI_BF16_VAE]
--cpu-vae             Run the VAE on the CPU. [env var: COMFYUI_CPU_VAE]
--fp8_e4m3fn-text-enc
Store text encoder weights in fp8 (e4m3fn variant).
[env var: COMFYUI_FP8_E4M3FN_TEXT_ENC]
--fp8_e5m2-text-enc   Store text encoder weights in fp8 (e5m2 variant). [env
var: COMFYUI_FP8_E5M2_TEXT_ENC]
--fp16-text-enc       Store text encoder weights in fp16. [env var:
COMFYUI_FP16_TEXT_ENC]
--fp32-text-enc       Store text encoder weights in fp32. [env var:
COMFYUI_FP32_TEXT_ENC]
--directml [DIRECTML_DEVICE]
Use torch-directml. [env var: COMFYUI_DIRECTML]
--disable-ipex-optimize
Disables ipex.optimize when loading models with Intel
GPUs. [env var: COMFYUI_DISABLE_IPEX_OPTIMIZE]
--preview-method [none,auto,latent2rgb,taesd]
Default preview method for sampler nodes. [env var:
COMFYUI_PREVIEW_METHOD]
--use-split-cross-attention
Use the split cross attention optimization. Ignored
when xformers is used. [env var:
COMFYUI_USE_SPLIT_CROSS_ATTENTION]
--use-quad-cross-attention
Use the sub-quadratic cross attention optimization .
Ignored when xformers is used. [env var:
COMFYUI_USE_QUAD_CROSS_ATTENTION]
--use-pytorch-cross-attention
Use the new pytorch 2.0 cross attention function. [env
var: COMFYUI_USE_PYTORCH_CROSS_ATTENTION]
--disable-xformers    Disable xformers. [env var: COMFYUI_DISABLE_XFORMERS]
--gpu-only            Store and run everything (text encoders/CLIP models,
etc... on the GPU). [env var: COMFYUI_GPU_ONLY]
--highvram            By default models will be unloaded to CPU memory after
being used. This option keeps them in GPU memory. [env
var: COMFYUI_HIGHVRAM]
--normalvram          Used to force normal vram use if lowvram gets
automatically enabled. [env var: COMFYUI_NORMALVRAM]
--lowvram             Split the unet in parts to use less vram. [env var:
COMFYUI_LOWVRAM]
--novram              When lowvram isn't enough. [env var: COMFYUI_NOVRAM]
--cpu                 To use the CPU for everything (slow). [env var:
COMFYUI_CPU]
--disable-smart-memory
Force ComfyUI to agressively offload to regular ram
instead of keeping models in vram when it can. [env
var: COMFYUI_DISABLE_SMART_MEMORY]
--deterministic       Make pytorch use slower deterministic algorithms when
it can. Note that this might not make images
deterministic in all cases. [env var:
COMFYUI_DETERMINISTIC]
--dont-print-server   Don't print server output. [env var:
COMFYUI_DONT_PRINT_SERVER]
--quick-test-for-ci   Quick test for CI. [env var:
COMFYUI_QUICK_TEST_FOR_CI]
--windows-standalone-build
Windows standalone build: Enable convenient things
that most people using the standalone windows build
will probably enjoy (like auto opening the page on
startup). [env var: COMFYUI_WINDOWS_STANDALONE_BUILD]
--disable-metadata    Disable saving prompt metadata in files. [env var:
COMFYUI_DISABLE_METADATA]
--multi-user          Enables per-user storage. [env var:
COMFYUI_MULTI_USER]
--create-directories  Creates the default models/, input/, output/ and temp/
directories, then exits. [env var:
COMFYUI_CREATE_DIRECTORIES]
--plausible-analytics-base-url PLAUSIBLE_ANALYTICS_BASE_URL
Enables server-side analytics events sent to the
provided URL. [env var:
COMFYUI_PLAUSIBLE_ANALYTICS_BASE_URL]
--plausible-analytics-domain PLAUSIBLE_ANALYTICS_DOMAIN
Specifies the domain name for analytics events. [env
var: COMFYUI_PLAUSIBLE_ANALYTICS_DOMAIN]
--analytics-use-identity-provider
Uses platform identifiers for unique visitor
analytics. [env var:
COMFYUI_ANALYTICS_USE_IDENTITY_PROVIDER]
--distributed-queue-connection-uri DISTRIBUTED_QUEUE_CONNECTION_URI
EXAMPLE: "amqp://guest:guest@127.0.0.1" - Servers and
clients will connect to this AMPQ URL to form a
distributed queue and exchange prompt execution
requests and progress updates. [env var:
COMFYUI_DISTRIBUTED_QUEUE_CONNECTION_URI]
--distributed-queue-worker
Workers will pull requests off the AMQP URL. [env var:
COMFYUI_DISTRIBUTED_QUEUE_WORKER]
--distributed-queue-frontend
Frontends will start the web UI and connect to the
provided AMQP URL to submit prompts. [env var:
COMFYUI_DISTRIBUTED_QUEUE_FRONTEND]
--distributed-queue-name DISTRIBUTED_QUEUE_NAME
This name will be used by the frontends and workers to
exchange prompt requests and replies. Progress updates
will be prefixed by the queue name, followed by a '.',
then the user ID [env var:
COMFYUI_DISTRIBUTED_QUEUE_NAME]
Args that start with '--' can also be set in a config file (config.yaml or
config.json or specified via -c). Config file syntax allows: key=value,
flag=true, stuff=[a,b,c] (for details, see syntax at https://goo.gl/R74nmi).
In general, command-line values override environment variables which override
config file values which override defaults.
Distributed, Multi-Process and Multi-GPU Comfy
This package supports multi-processing across machines using RabbitMQ. This means you can launch multiple ComfyUI backend workers and queue prompts against them from multiple frontends.
Getting Started
ComfyUI has two roles: worker and frontend. An unlimited number of workers can consume and execute workflows (prompts) in parallel; and an unlimited number of frontends can submit jobs. All of the frontends' API calls will operate transparently against your collection of workers, including progress notifications from the websocket.
To share work among multiple workers and frontends, ComfyUI uses RabbitMQ or any AMQP-compatible message queue like SQS or Kafka.
Example with RabbitMQ and File Share
On a machine in your local network, install Docker and run RabbitMQ:
docker run -it --rm --name rabbitmq -p 5672:5672 rabbitmq:latest
Find the machine's main LAN IP address:
Windows (PowerShell):
Get-NetIPConfiguration | Where-Object { $_.InterfaceAlias -like '*Ethernet*' -and $_.IPv4DefaultGateway -ne $null } | ForEach-Object { $_.IPv4Address.IPAddress }
Linux
ip -4 addr show $(ip route show default | awk '/default/ {print $5}') | grep -oP 'inet \K[\d.]+'
macOS
ifconfig $(route get default | grep interface | awk '{print $2}') | awk '/inet / {print $2; exit}'
On my machine, this prints 10.1.0.100, which is a local LAN IP that other hosts on my network can reach.
On this machine, you can also set up a file share for models, outputs and inputs.
Once you have installed this Python package following the installation steps, you can start a worker using:
Starting a Worker:
# you must replace the IP address with the one you printed above
comfyui-worker --distributed-queue-connection-uri="amqp://guest@guest10.1.0.100"
All the normal command line arguments are supported. This means you can use --cwd to point to a file share containing the models/ directory:
comfyui-worker --cwd //10.1.0.100/shared/workspace --distributed-queue-connection-uri="amqp://guest@guest10.1.0.100"
Starting a Frontend:
comfyui --listen --distributed-queue-connection-uri="amqp://guest@guest10.1.0.100" --distributed-queue-frontend
However, the frontend will not be able to find the output images or models to show the client by default. You must specify a place where the frontend can find the same outputs and models that are available to the backends:
comfyui --cwd //10.1.0.100/shared/workspace --listen --distributed-queue-connection-uri="amqp://guest@guest10.1.0.100" --distributed-queue-frontend
You can carefully mount network directories into outputs/ and inputs/ such that they are shared among workers and frontends; you can store the models/ on each machine, or serve them over a file share too.
Operating
The frontend expects to find the referenced output images in its --output-directory or in the default outputs/ under --cwd (aka the "workspace").
This means that workers and frontends do not have to have the same argument to --cwd. The paths that are passed to the frontend, such as the inputs/ and outputs/ directories, must have the same contents as the paths passed as those directories to the workers.
Since reading models like large checkpoints over the network can be slow, you can use --extra-model-paths-config to specify additional model paths. Or, you can use --cwd some/path, where some/path is a local directory, and, and mount some/path/outputs to a network directory.
Community
Chat on Matrix: #comfyui_space:matrix.org, an alternative to Discord.